How to Set Up A Wayfinder Digital Experience
Wayfinder App Overview
A wayfinding digital experience consists of the Wayfinder Feature and Wayfinder Components. Studio Users interested in building a Wayfinder digital experience in their Studio, can either assemble the app themselves or copy the Starter Kit. Studio Users who copy the Starter Kit will still need to add a map and configure their own Waypoints and paths.
When creating a Wayfinding digital experience, it is recommended that Studio Users create the following Pages with Wayfinding Components:
- Home Page with Navigation Box Component.
- Directions Page with Directions Component. This should be the only Component on the Page.
- Directory Page with Directory Component.
- Parking Page with Remember Location Component.
The Wayfinder Components will automatically update as Waypoints are added and configured within the Wayfinder Feature.
Learn more about implementing your Wayfinder digital experience:
-
1
-
Click the
Pencil Icon next to Wayfinder.
-
2
-
Click on
Microservice to expand the section.
-
3
-
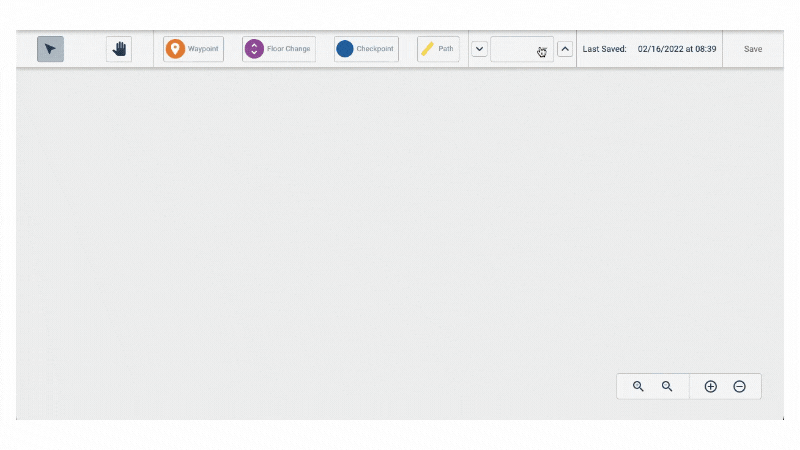
Click
Launch Admin. A new tab will open where a map, Waypoints, and paths can be added and managed.
-
4
-
Click the Add Floor
dropdown.
-
5
-
Click
Add Floor.
-
6
-
Place cursor in the
'New Floor' field to enter a floor name.
-
7
-
Click Image Icon. A window will pop up where an image file can be added. App end users will not see any maps loaded. Map images are strictly for Studio Users to utilize in configuring Waypoints and paths that will guide app end users.
-
8
-
Click
Save in the top right, before existing the tab and returning to the Studio.
Repeat steps 5 through 7 to add additional maps of each level.
Add a unique map image for each level of the building.
-
1
-
Click the
Pencil Icon next to Wayfinder.
-
2
-
Click on
Microservice to expand the section.
-
3
-
Click
Launch Admin. A new tab will open where a map, Waypoints, and paths can be added and managed.
-
4
-
Click
Waypoint in the top menu.
-
5
-
Click
on the map to place the Waypoint, which will appear as an orange circle. An alert will appear indicating that the Waypoint is not connected to a path.
-
6
-
Click the
Arrow select tool and click on the
Waypoint. A window will appear on the left-hand side with the Waypoint's settings.
-
7
-
In the
Waypoint settings menu: Enter the Waypoint Name, Description, and an image of the location. These settings will appear in the Wayfinder's Directory.
-
8
-
To create a contextual activation for a specific Waypoint, enter a
Waypoint Text Code Activation. This should be an alphanumeric code, such as "main" or "elevator."
-
9
-
Click
Save in the top right, before existing the tab and returning to the Studio.

Waypoints can be added, edited, or deleted at any time.
-
1
-
Within the Waypoints settings menu, add a unique
Waypoint Text Code Activation to all of the Waypoints where a contextual activation is wanted. This should be an alphanumeric code, such as "main" or "elevator."
-
2
-
Make note of the Waypoint Text Code Activations.
-
3
-
Click
Save in the top right, before exiting the tab and returning to the Studio.
-
4
-
From the Studio, click on
Activations along the top navigation.
-
5
-
Click the
Green + Icon, located in the bottom right corner.
-
6
-
Enter a
Batch Name, such as Location Activations.
-
7
-
In the field
Number of Activations to Generate, enter 1.
-
8
-
In the field
Add a custom short code for this batch, enter at least three letters, no special characters, such as way.
-
9
-
Toggle on Generate these activations for a specific digital? A new field, Search for Apps, will appear. Beginning typing in the name of the app as it appears in the Studio. Select the app.
-
10
-
Toggle off
Add 3 random digits to the end of each activation for added security?
-
11
-
Click
Save in the top right. Studio Users will be redirected back to the Activations view.
-
12
-
Find the Batch Name that was just created. Click the
upload download icon (two arrows).
-
13
-
Select download spreadsheet and save it.
-
14
-
Open the downloaded Excel file.
-
15
-
In the downloaded Excel, enter each Waypoint Text Code Activation in
column A under "Label Key." Each Waypoint Text Code Activation must be entered in its own row. In
column B copy the app's name as it appears in row 1. Save the file.
Be sure to not add any spaces after the Text Code Activations or App Name. Do not add any other data to the Excel.
-
16
-
Return to the Studio tab and click Import Activation Data. Select the updated Excel file. A summary will appear confirming the updates have been successfully added.
-
17
-
Click the
white X in the top left corner to exit the upload/download screen.
-
18
-
Return to the app and open the
Wayfinder Feature Admin. Download the QR codes for each Waypoint Text Code Activation.
-
19
-
Click Save in the top right, before exiting the tab and returning to the Studio.
-
20
-
In the Studio, click
Save at the bottom of the right column, under the Wayfinder Feature Properties.
-
21
-
Publish the app to make the Waypoint Text Code Activation live.
-
How to Capture Feedback
The Wayfinder Directions Component includes the option to capture user feedback after a visitor completes a route.
3 Steps to Capture Feedback
1
Create a Table to store user feedback. Learn
How to Configure the Table.
2
Add the Wayfinder Directions Component to a Page. Under the Feedback section of the Component, set the Table property to the new Table just created to capture user feedback.
3
Publish your digital experience and start getting valuable user feedback.
How to Configure the Table
1
Open
Data, which is located in the blue left-hand navigation of the Studio.
2
Click the
green plus icon in the lower right. Name the new table and click
save.
3
Create 10 columns with the following names and types:
| Column Name |
Type |
| createdtimestamp |
Date/Time |
| endpoint |
Text |
| startpoint |
Text |
| feedback |
Text |
| feedbacktimestamp |
Date/Time |
| commentshown |
Text |
| commentclosed |
Text |
| comment |
Text |
| commenttimestamp |
Text |
| skipcomment |
Text |
4
Set the permissions to "All" for each option. Then click Save to complete the Table setup.

The Table is now ready to be used in the Component.


